
Most Knoxville homeowners inspect attics and ignore crawls, until musty air, a home inspector, or a soggy spring on red clay forces the issue. This checklist walks you through a safe DIY crawl inspection: what to wear, what to photograph, humidity numbers that matter, and when to call a pro. Use it before buying in Farragut, listing in Maryville, or opening a Sevierville cabin for rental season.
When to inspect (Knoxville calendar)
- April: before humid season; baseline RH
- September: after peak summer; worst-case mold check
- 48 hours after major storms: clay holds water; pooling shows drainage gaps
- Before listing or making an offer: crawl issues are top negotiation items in Knox & Blount County
Safety and access
Wear coveralls, gloves, closed shoes, headlamp, and N95 if mold is visible. Verify entry hatch framing is sound; use a buddy system. Watch for low wires, protruding nails, animal nests, and unstable pier stacks. If clearance is under 24 inches or you smell sewer gas, stop and call a pro.
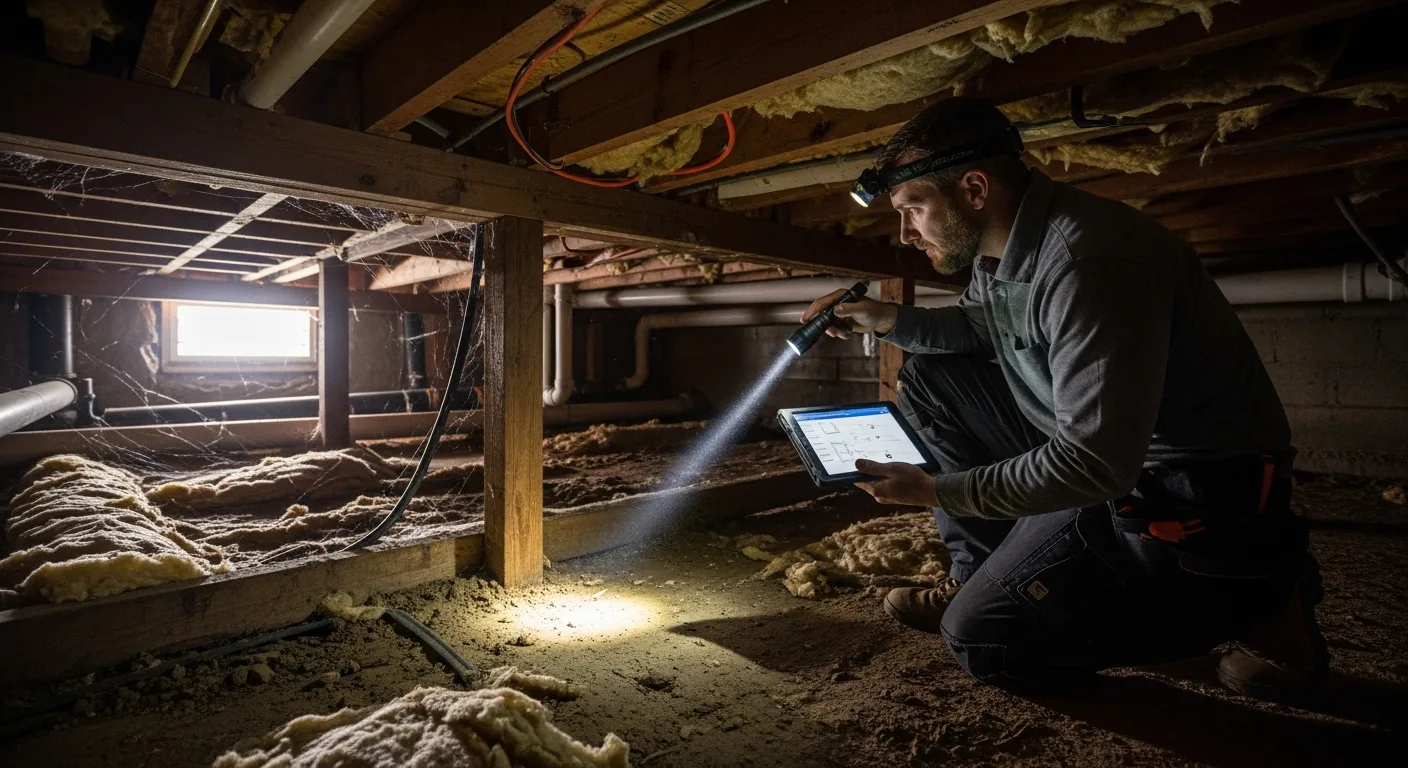
Photo checklist (four corners + center)
- Each corner: soil, liner, wall, pier base
- Center bay: ducts, plumbing, standing water
- Every vent: screen, opening size, obstructions
- HVAC: flex duct, rust, mold on exterior
- Entry hatch and rim joist from inside
Date-stamp photos. Compare year-over-year if you own the home. Slow mold spread is easier to catch in sequences.
Humidity and moisture measurements
Bring a hygrometer ($15–30). Log RH at center and near walls. In August, readings above 60% mean mold risk; above 75% means active failure in vented crawls. Note standing water depth and how far from walls. Efflorescence (white powder on block) signals wall moisture. May need foundation waterproofing, not just a liner.
Ground and vapor barrier
- Bare soil visible anywhere?
- Liner torn, unsealed at piers, or ponding on top of plastic?
- 6-mil vs 12–20 mil: thin DIY plastic fails on clay
- Debris, old wood, or organic litter holding moisture?
Spec reference: vapor barrier installation Knoxville.
Vents and air sealing
Count open vents. In Knoxville humidity, open summer vents import wet air. See encapsulation vs ventilation. Check rim joist gaps, HVAC penetrations, and unsealed plumbing chases. They leak conditioned air and raise bills.
Insulation condition
- Fiberglass fallen, blackened, or on the ground?
- Missing insulation on rim joist?
- Moisture-compacted batts: R-value gone
Do not reinstall fiberglass before drying , insulation upgrades come after encapsulation.
Mold and wood decay
Probe joists with a flathead screwdriver. Soft wood means rot, not surface mold. Document color and pattern (black/green/white). Health context: mold symptoms guide. Remediation path: mold removal service.
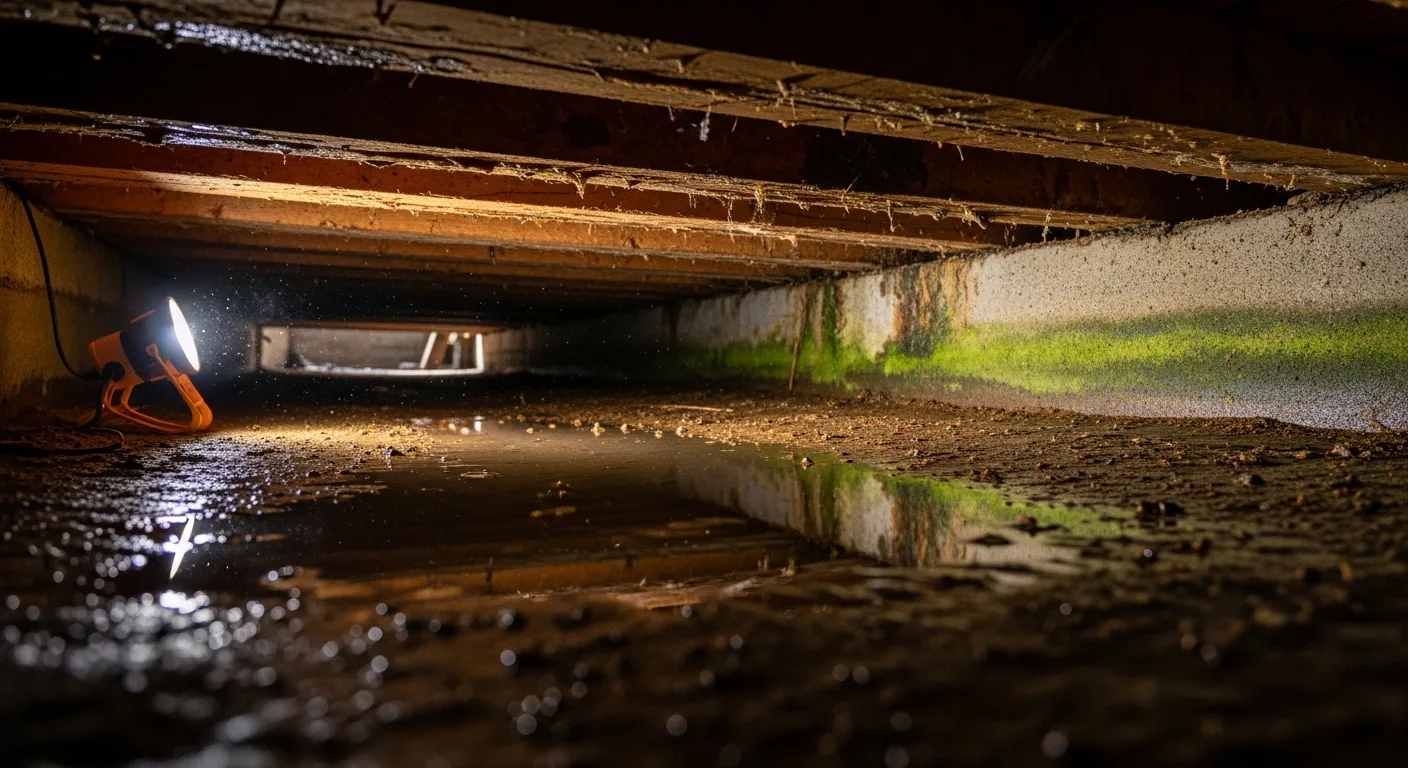
Drainage and plumbing
- Sump pit: pump present, plugged in, discharges away from foundation?
- Stains suggesting past overflow
- Drip lines, leaking traps, condensate drains dumping in crawl
- Downspouts outside: extension ≥6 ft (walk perimeter)
Water solutions: crawl space waterproofing.
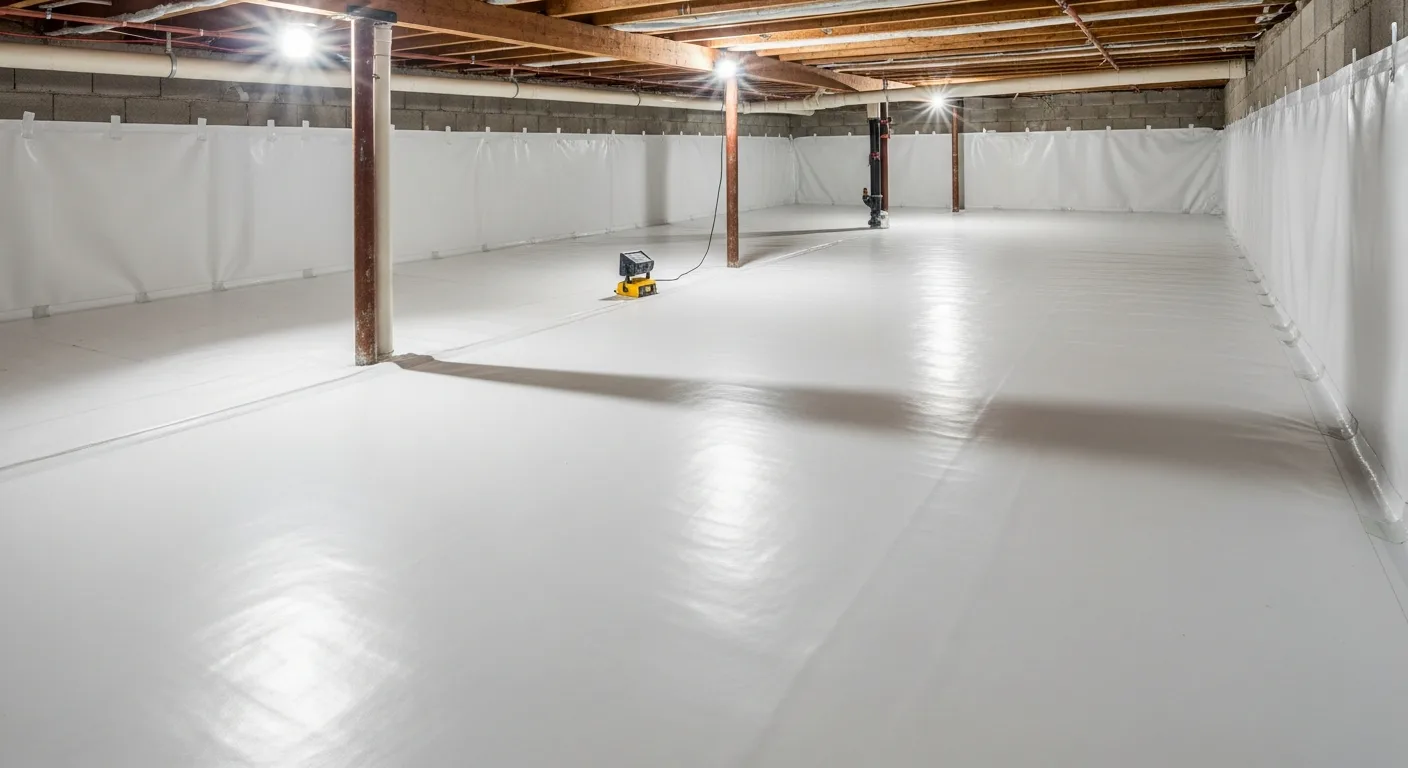
Dehumidifier check
If present: pint capacity label, drain connected (no bucket), filter clean, RH setpoint 50–55%. Undersized or bucket units in crawls fail in 12–18 months , best dehumidifier guide.
Step-by-step walkthrough
- Gear up and access safely: Wear coveralls, gloves, headlamp, and N95 if mold suspected. Confirm crawl entry is structurally safe.
- Photograph all four corners and center: Capture soil, liner, piers, ducts, and vents, date-stamped photos help track change over time.
- Log humidity and standing water: Record RH at multiple points; note puddles, stains, and efflorescence on block walls.
- Inspect vents, insulation, and penetrations: Open vents in summer import humidity; fallen fiberglass and unsealed rim gaps are common leak paths.
- Schedule pro inspection if any red flags: Call for moisture mapping and itemized repair scope before mold spreads to subfloor and HVAC returns.
Red flags: call a pro immediately
- Standing water touching joists
- Soft or sagging joists
- Extensive mold (>10 sq ft on structure)
- Sewer odor or gas smell
- Asbestos-era wrap on ducts (do not disturb. Test first)
Home inspection alignment (buyers & sellers)
Knox County inspectors report fungal growth, improper moisture barrier, and drainage deficiencies routinely. Sellers who fix crawls before photos get cleaner reports; buyers use this checklist during due diligence to scope credits. Median home ~$256,600. Crawl repairs are cheaper pre-close than post-move.
Suburb-specific watch items
Farragut: large duct bundles, lake humidity. Maryville: hillside water at north walls. Powell / Halls, low clearance, fallen insulation. Sevierville, cabin vacancy, pier foundations. Clay context: clay soil guide.
After inspection, typical fix stack
Drainage → mold if needed → vapor barrier & vent seal → dehumidifier → insulation. Budget $5,000–$15,000 for full encapsulation, line items in cost guide.
Prefer pros to crawl? Free inspection with moisture logs: 865-344-5507.